3 minutes
Lab — Quick NAT & DHCP refresher
I thought to myself, it had been a couple of weeks since setting up NAT and DHCP in a lab. Therefore, I decided to do a quick refresher to ensure I still remembered the process and commands. As it turns out, I still remembered them well, and this lab only took about 10 minutes to get going.
What’s Configured
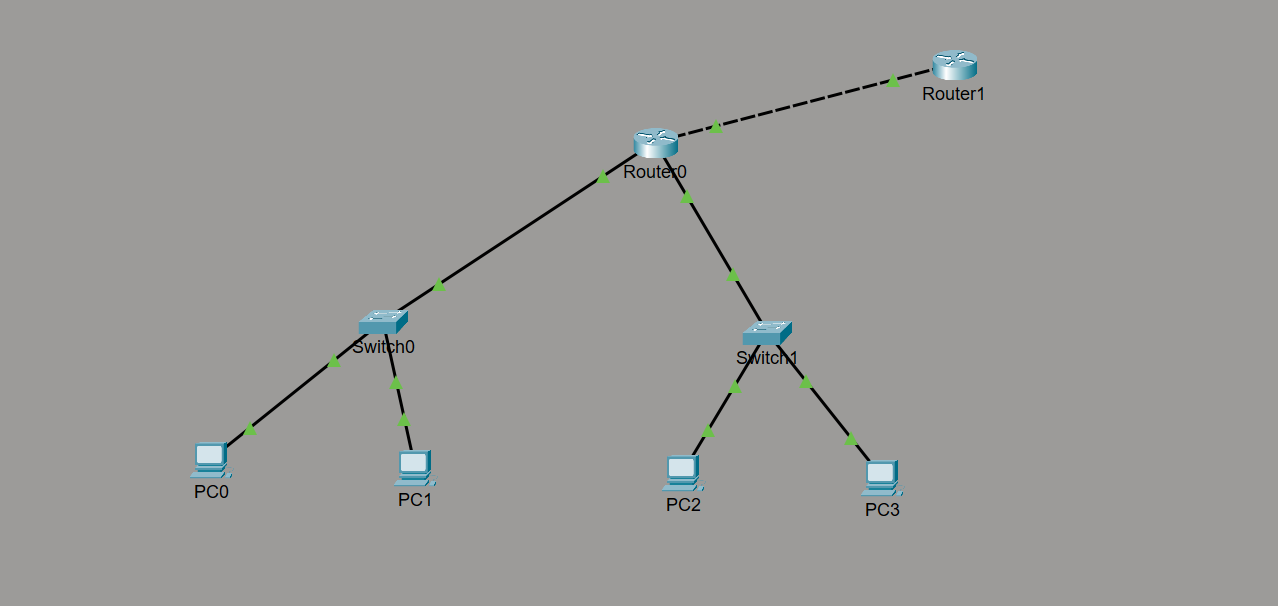
Firstly, I configured the IP link between Router 0 and Router 1 (Router 1 is simulating the internet). Then I added a loopback interface to Router 1 (internet/ISP router) with the IP address of 1.1.1.1 and set the default route to go back to Router 0. A note on setting the default route: this is a trap that caught me a few times in the past, and it will probably catch me again. When simulating an ISP this way, we need to set the default route to point back to the edge router of the network; otherwise, return traffic from the ISP router doesn’t know how to get back to the LAN.
Next, I assigned IP addresses to Router 0’s interfaces pointing toward the switches: to Switch 0 I assigned 192.168.1.1 and to Switch 1 I assigned 192.168.2.1.
Then I configured DHCP by setting up two pools, one for each broadcast domain. I assigned their interface IPs as the default router address, allowing the full /24 networks to be assigned, and for good measure, I assigned a DNS address and domain name.
Following that, I configured the PCs to accept DHCP and watched as each received its allocation from the DHCP server.
Before testing connectivity, I proceeded with the NAT setup. On Router 0, I first added a permit access list, allowing both 192.168.1.0 and 192.168.2.0 networks through. (Because I started on 192.168.1.0 rather than 192.168.0.0, I used a separate statement for each network in the ACL, as restricting with the wildcard would have gone through the 192.168.0.0-192.168.3.255 range.) I set the inside and outside NAT interfaces, then added the NAT statement using the list and enabling overload.
The final piece of the puzzle was to point Router 0’s default route out to the ISP.
That was it—the complete basic setup I was aiming for to refresh NAT and DHCP configuration. So, I went ahead and sent a ping from each broadcast domain to 1.1.1.1 with success on each attempt. I verified the NAT translation table and done a quick review of the running config of the router to finish up.
It’s important, while learning new configurations and topics, to keep practicing the setups. This reinforces the command flow and also helps retain the theory behind it as we think about what we are doing.
This concludes a short and sweet refresher setup.